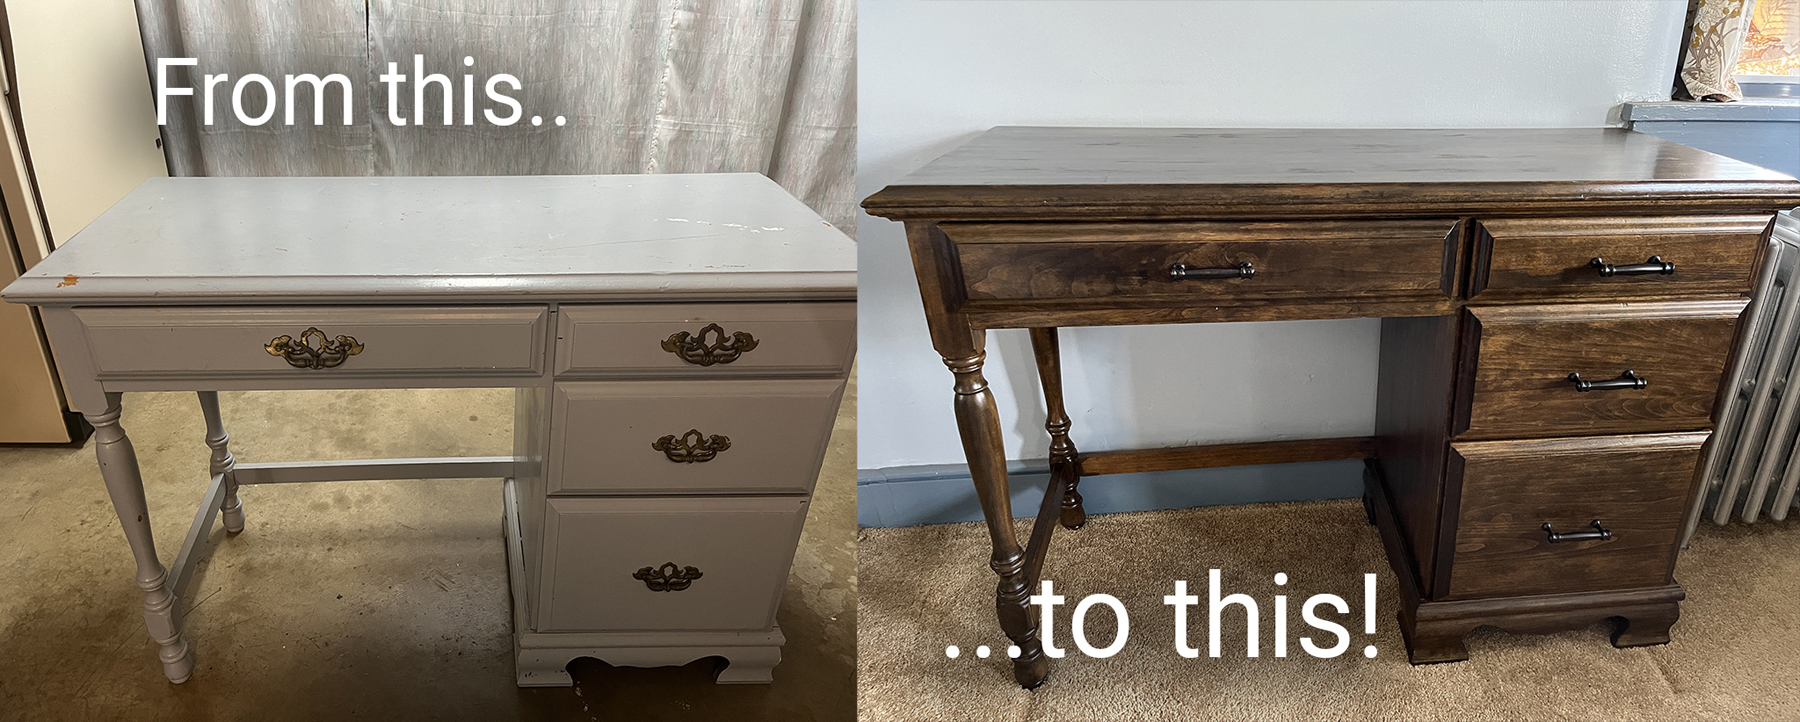
Underneath the chipped paint and tarnished, dated hardware, was the desk still a piece of furniture worth saving? I had no experience in furniture restoration, but I decided to find out.
My sister bought the wooden desk many years ago at a yard sale. After a few years in her house, Brenda freshened it up with coat of blue gray paint, which eventually chipped. When she and my brother-in-law remodeled their house recently, they decided the desk would have to go. “Anyone want it?” Brenda posted on our family chat.

“It’ll be a lot of work,” my parents grimly told me after the desk was in our garage.
“I know, but I’ll do it myself,” I assured them, and started watching furniture restoration videos on Youtube and making a shopping list for Home Depot.

One of the first steps was removing the fleur-de-lis drawer pulls.

It was March and the weather was still chilly when I started the project, so I bundled up and went to work with the garage door opened a crack and a fan circulating the air. I spread newspapers on the floor, and Dad got out the sawhorses for me to use depending on what part of the desk I was working on.

Stripping off the paint and the old varnish was the first step, and by far the most time-consuming part of the project. I worked a couple of hours a day for over a week, using citrus-scented stripping gel called Citristrip. There’s stronger, more professional stripping agents available, but Citristrip did the job well enough for me.

After some trial-and-error, I found a rhythm that worked for me. I would coat a section with a thick layer of Citristrip, cover it with plastic wrap, and then let the gel do its work as I as slept or went to my job. That evening or the next morning, I’d peel back the plastic wrap, and scrap away the gunk using a paint scrapper, 3M stripping pads, or a sharp triangular scraper that was great for getting in the corners. Then I would cover a new section with Citristrip and plastic wrap. My wrists, which already suffer from years of keyboard work, ached from grasping the scrapper, but there was nothing more satisfying than watching the crackled paint and varnish peel away to reveal beautiful wood grain underneath.

At first I was afraid it might be veneer furniture, and that digging too deep would bring up plywood, but Dad looked at it after I had removed some of the paint and pronounced the desk a good piece made from solid wood and “probably walnut.”
The Saturday I finished the stripping was warm enough that I could open the garage door completely and enjoy the spring day. After peeling off the last layer of gunk, I cleaned the wood with mineral sprits and filled the garage can with crumbled up newspapers, rags, and worn-out stripping pads. I even threw out my orange gloves, which had been new at the start of the project, but now had holes in two fingers.

I did the second half of the project in the barn. After letting the wood dry for several days, I started sanding. I rubbed fine grit sand paper on the curved surfaces and ran the power sander over the flat surfaces— kind of like ironing wood.
There were still imperfections, and I like dark furniture, so I decided to stain the desk a dark walnut color. Brenda gave me a half-filled can of stain the builders had left at their house after using it on the staircase— professional-grade, quick-drying stain that I dabbed on with t-shirt rags. The dark stain looked rich and beautiful.

The final step was a clear coat of polyacrylic Minwax. My parents’ expertise (both worked for years in a cabinet shop) and Youtube really helped me. Applying topcoat is more tricky than painting or staining, and you have to do several coats, sanding in between coats. Unfortunately, my third coat had inexplicable tiny bubbles that gave the smooth surface a bumpy feel. I sanded the bubbles and applied another layer of top, then decided it was satisfactory, even if some spots remain faintly freckled.

Once the fourth coat was dry, I added new hardware to the drawers and vacuumed the insides. Dad helped me carry the desk upstairs. I have my sewing machine on it now, and the drawers are a good place to store the threads and needles that I previously stuffed in a basket.
It was a DIY experiment worth doing. If you have time and room for the job, you might want to try furniture restoration yourself— and save a classic from the landfill.

That’s beautiful! You make it look easy! 😉
Thanks! It was easier to write about it than do it!
My daughter just bought a desk similiar to this at a thrift store, in hopes of finishing it! I’ll show her your post to inspire her!
Gina
Tell your daughter it will be a lot of work, but it’s something that will hopefully last for years to come!